
In this walk-through, we’ll cover how to create and configure a variable product in WooCommerce. Use it as a baseline reference.
Step 1:
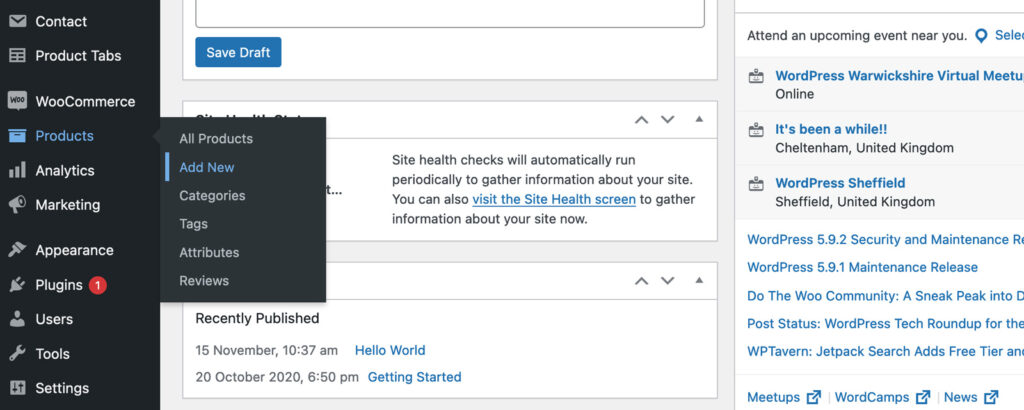
From your WordPress dashboard, navigate to Products > Add New. Click Add New.
Step 2:
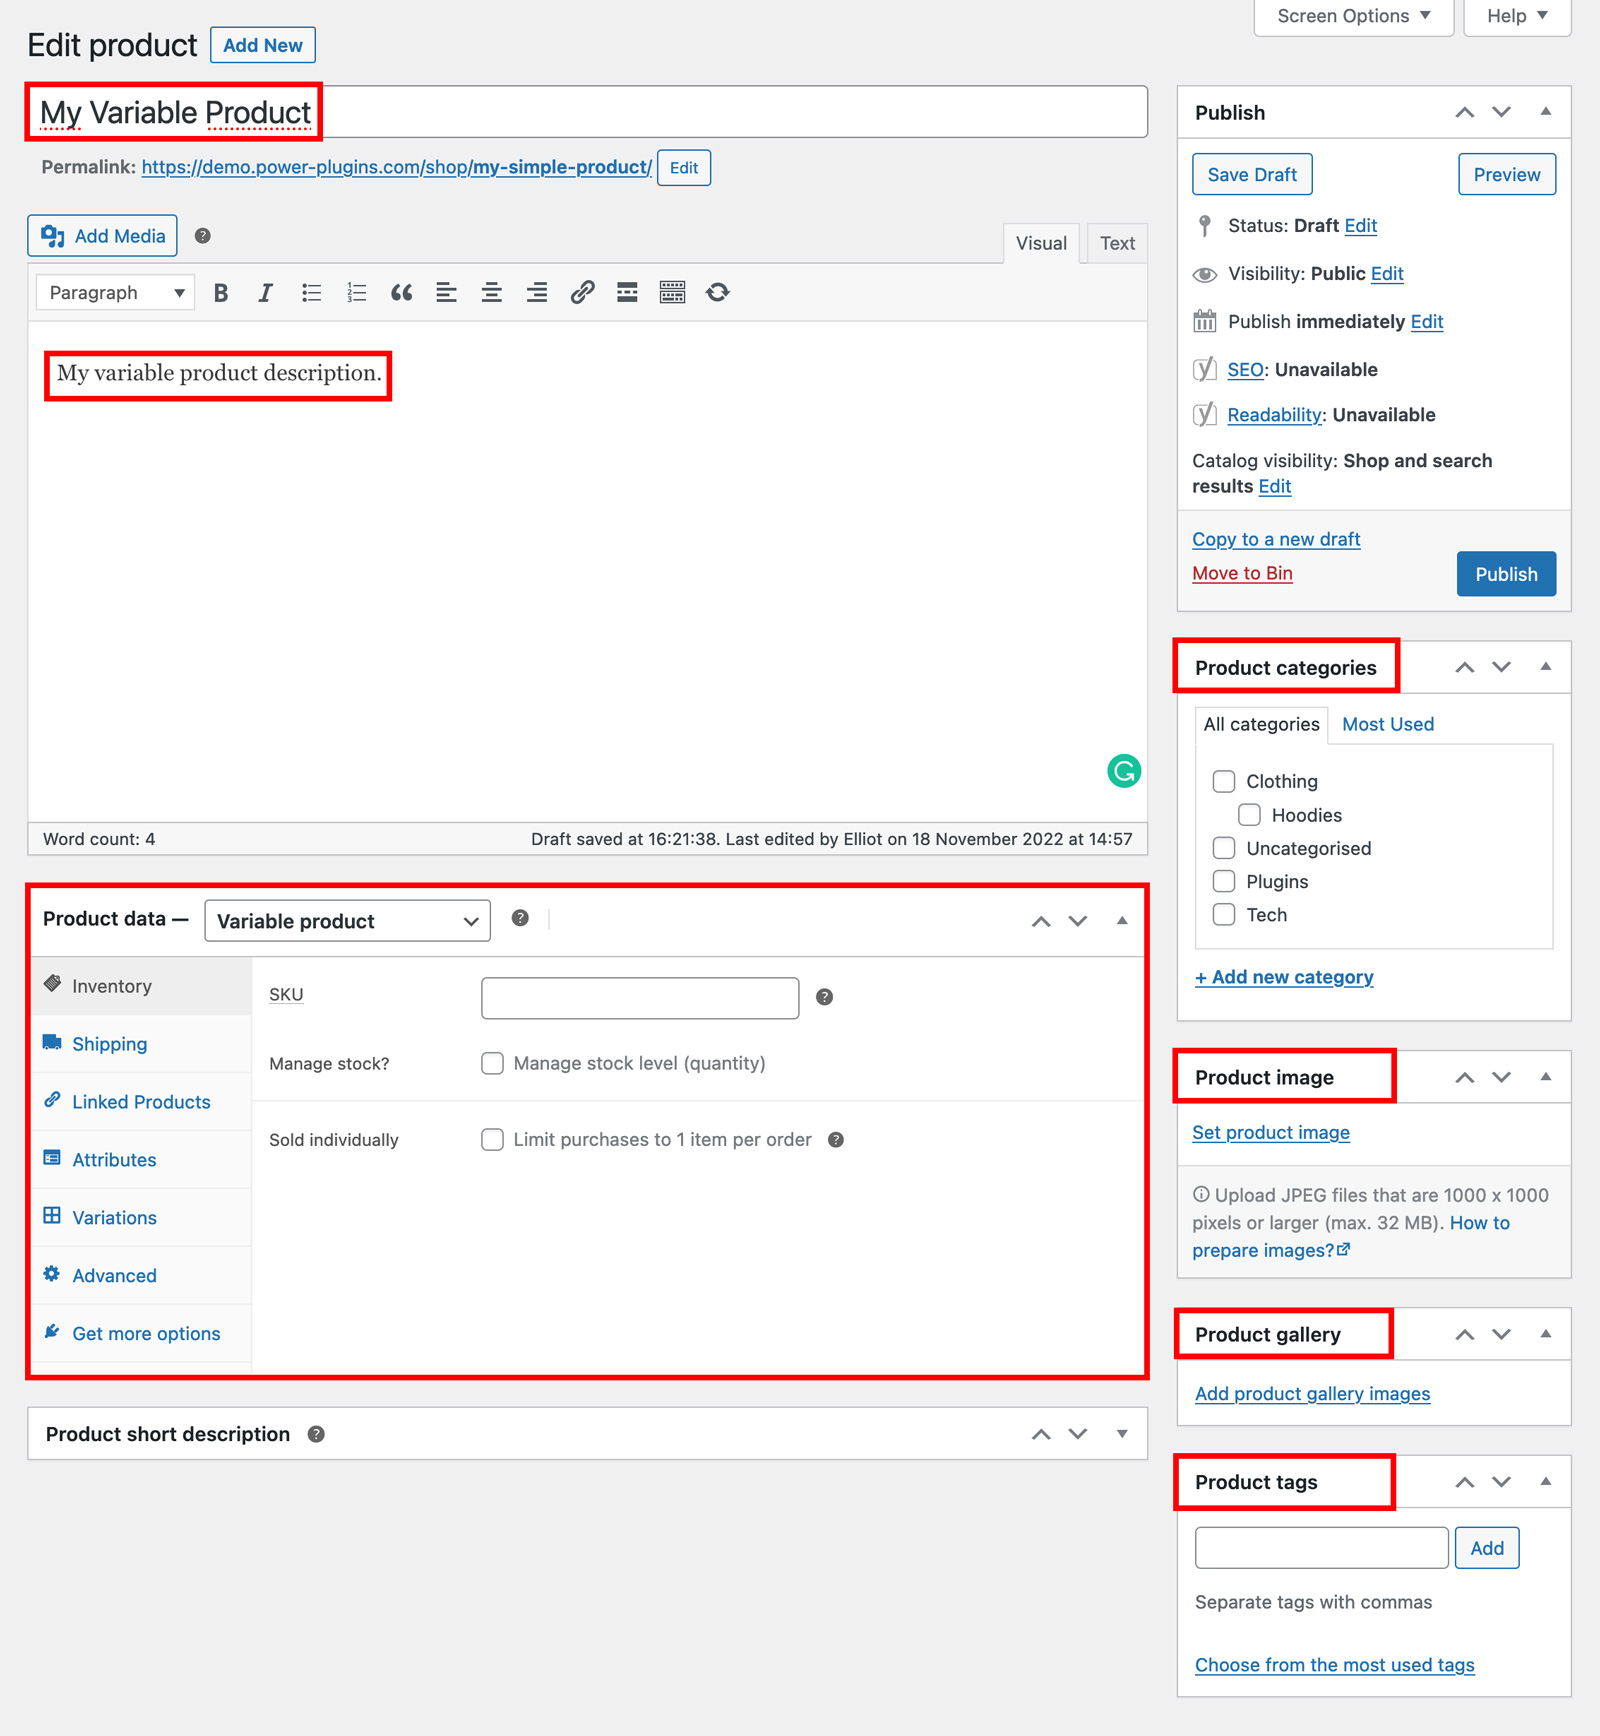
Afterward, a new screen will appear, presenting the product page editor. Here, you have the option to input your product’s name, description, main image, and supplementary images. Additionally, you can assign product categories and product tags from this interface.
Step 3: Product Data Settings:
In order to set our variable product up we must first input some key information. In the Product data panel you’ll find a series of tabs comprising:
- General settings – For configuring the regular price and sale price of the product.
- Inventory – For adding SKU(Stock Keeping Unit), managing stocks, and limiting purchases.
- Shipping – For configuring product weights & dimensions, and selecting a Shipping class.
- Linked Products – For selecting products for upsells and cross-sells.
- Attributes – Allowing you to add product attributes for a better description of the product, and/or choices.
- Variations – Allowing you to set the data for the individual variations of your product. A price, SKU, image, description, stock value, as well as the weight and dimensions of the item can all be set here.
- Advanced – For adding purchase notes, menu orders and enabling reviews.
- Get more options – For adding extensions to your WooCommerce store.
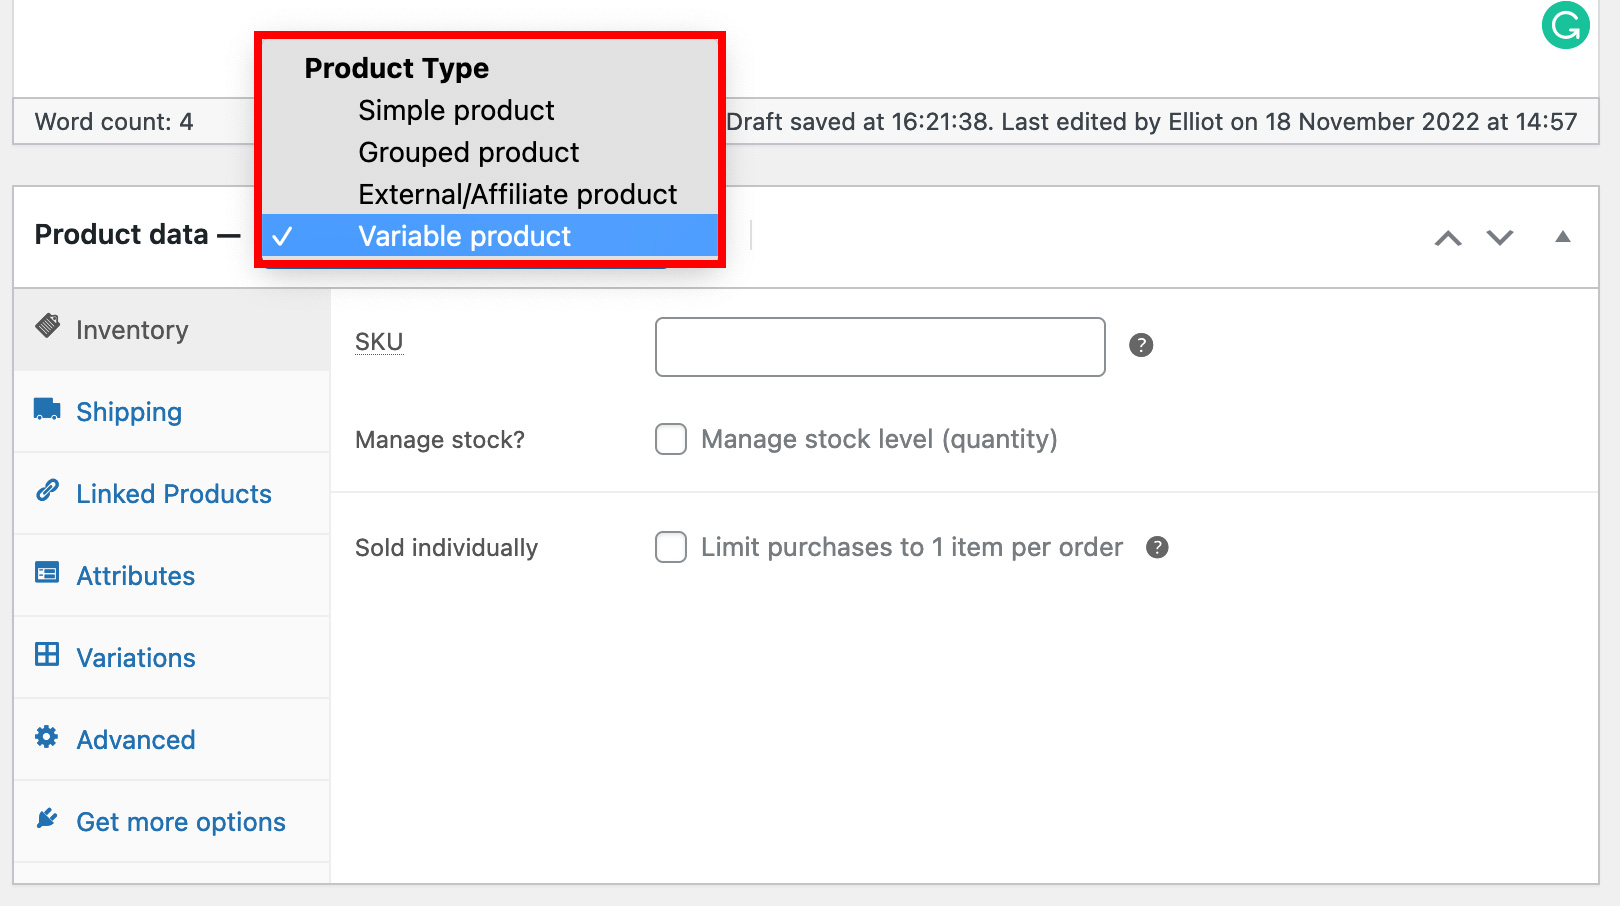
To set up your Variable product select ‘Vaiable product’ from the dropdown menu as shown below:
Step 4: Adding Attributes
Next, we need to add our product attributes.
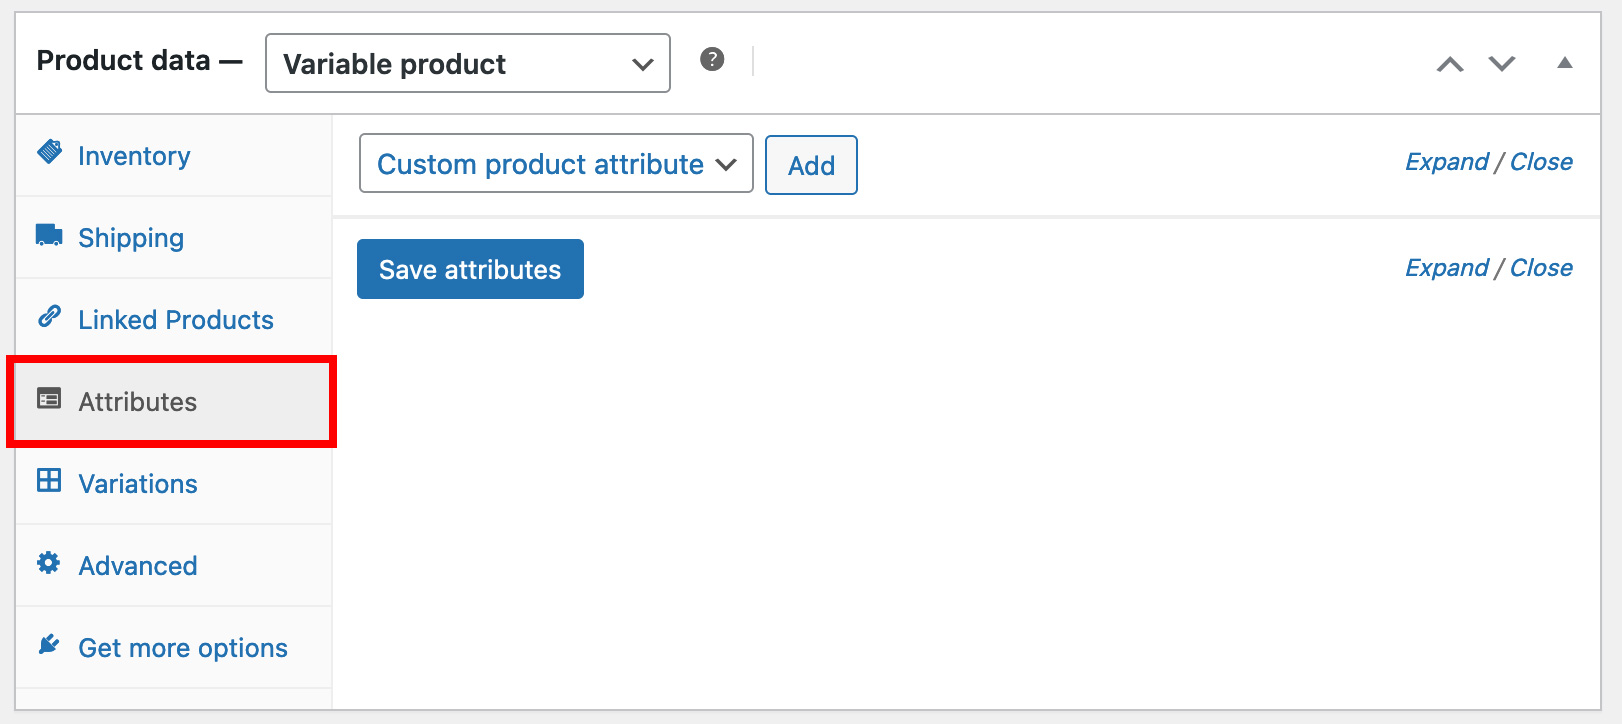
Important: WooCommerce allows you two ways to add product attributes.
METHOD 1:
The first method to use is if you want to have attributes that can be used across a range of other products. We recommend using this method before creating your variable product in Products > Attributes. Although this is not essential, it saves going back and forth between different sections of WooCommerce and makes for quicker page development.
From within Products > Attributes you can create all the attributes you need and configure all of the terms for them.
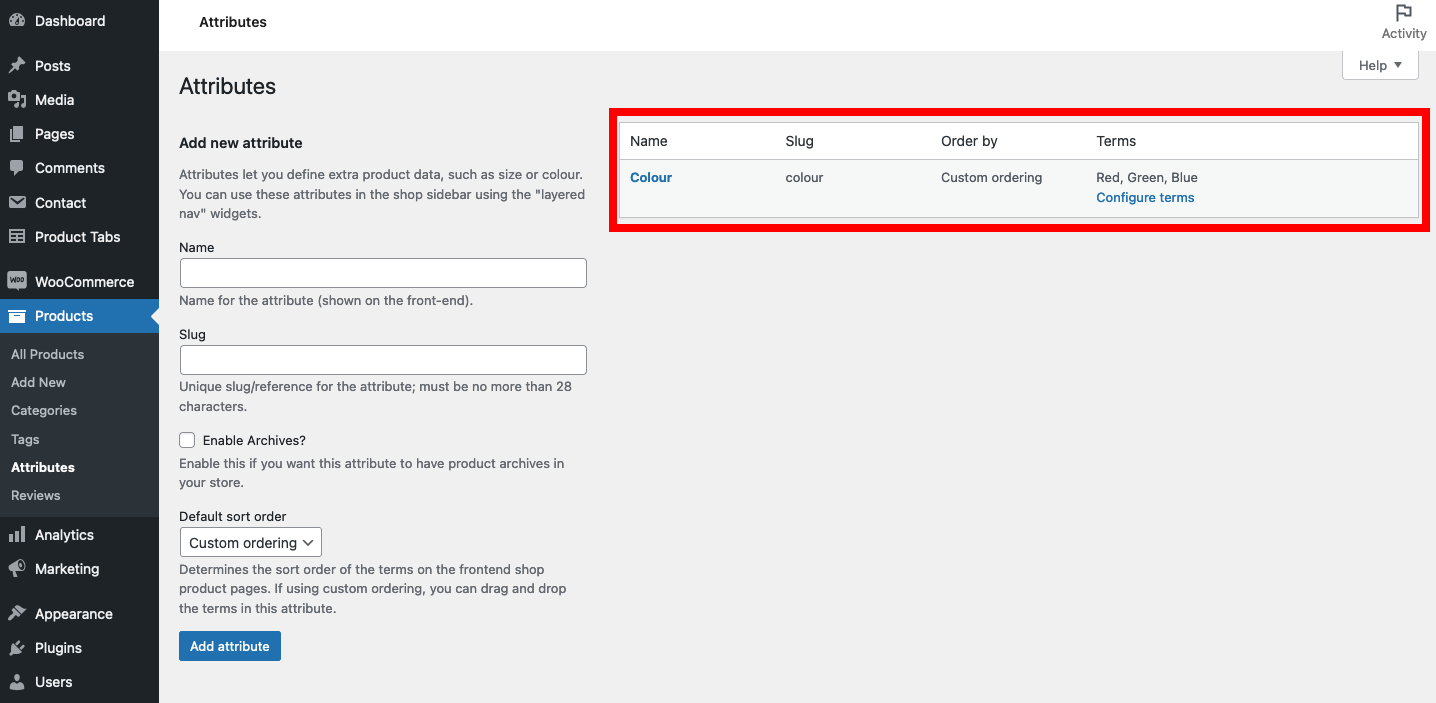
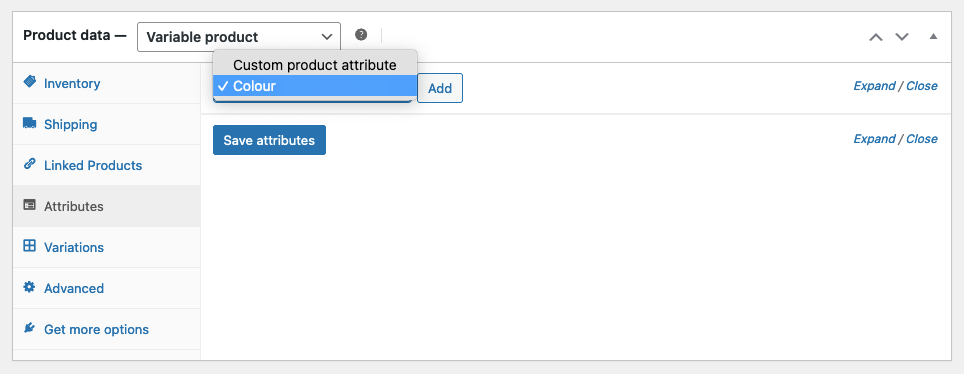
Once these are set up you’ll see them available under the Attributes tab. Simply select the attribute required and click ‘Add’.
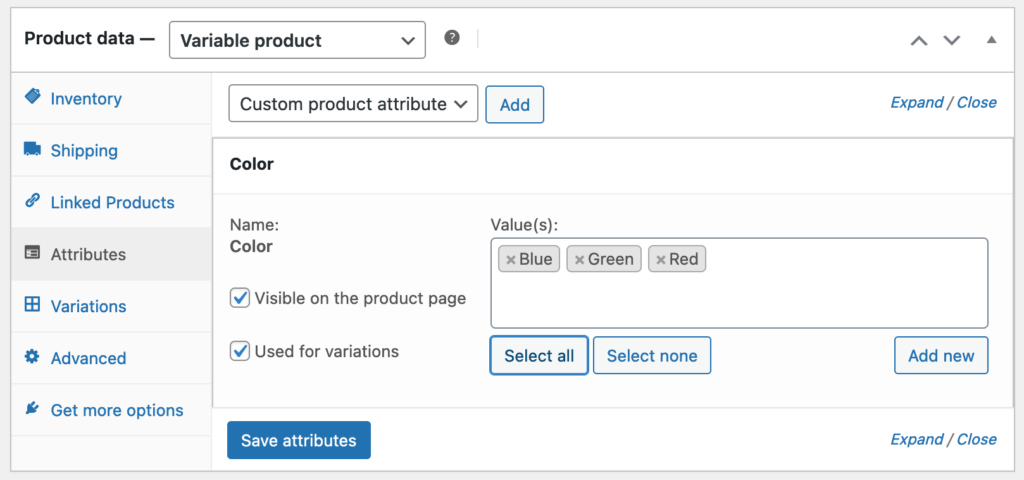
Now choose the values by either clicking ‘Select All’, or by typing the name of the value inside the ‘Value(s)’ box.
Make sure you have checked the ‘Visible on the product page’ and ‘Used for variations’ boxes checked if your want these to be selectable by customers.
Click ‘Save attributes’.
METHOD 2:
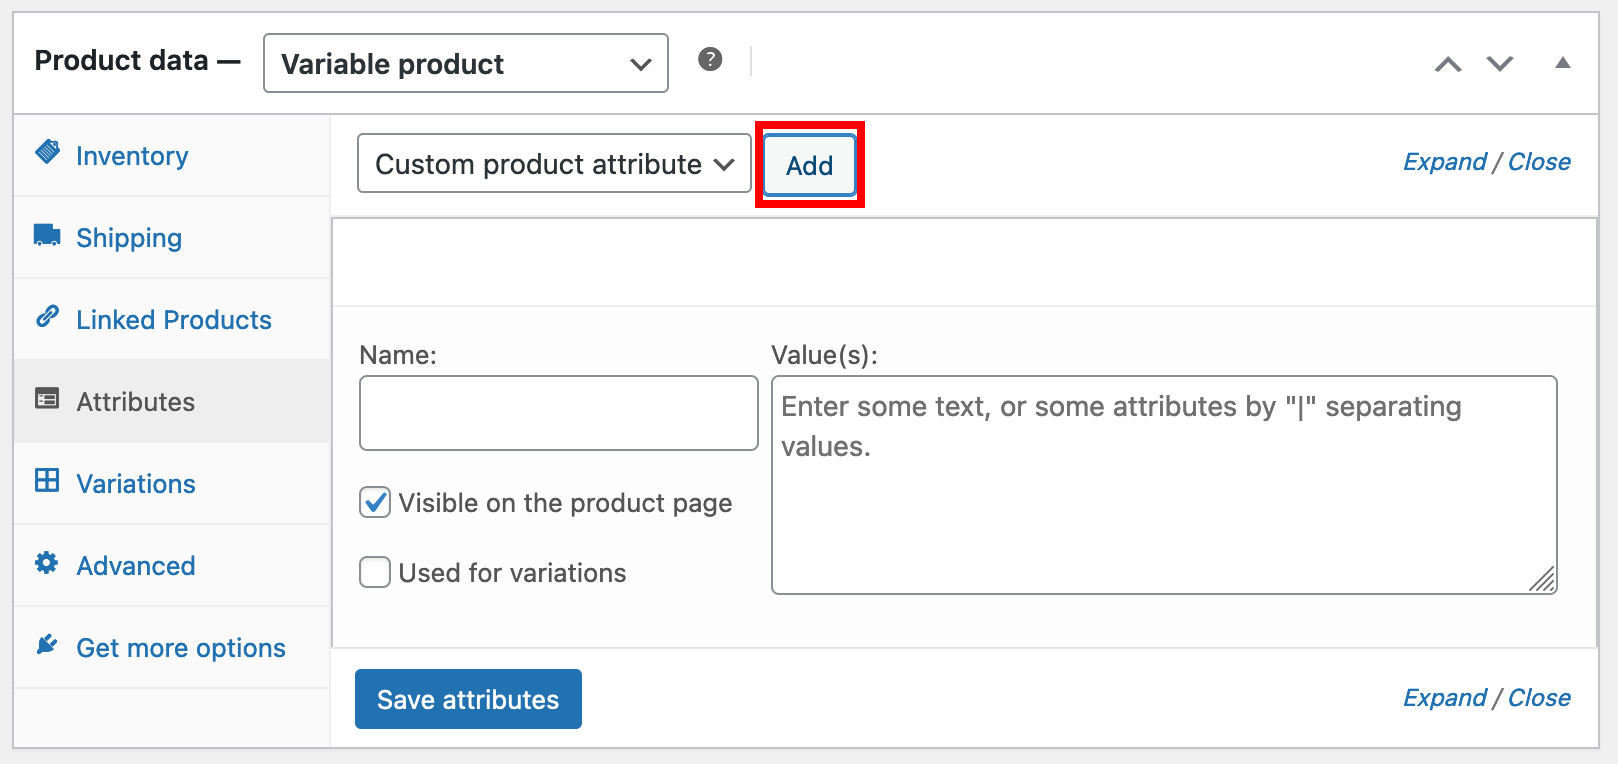
The second method is to add the attributes directly from within the product page by clicking the ‘Add’ button (shown below). This method is good if the attributes you’re adding are only going to apply to this product and nothing else in your store, as these custom product attributes are attached to this product only.
- Fill out the ‘Name’ field, e.g Colour.
- Create your value(s), e.g, Red, Green, Blue. Each value needs to be separated by a pipe ‘|’, like this: Red | Green | Blue.
- Leave ‘Visible on the product page’ checked if you want customers to see the title and values. You must also check the box that says ‘Used for variations’.
- Click ‘Save attributes’.
Step 5: Adding Variations
Click the ‘Variations’ tab.
There are two methods available for setting your product variations.
METHOD 1:
This method creates variations from the value(s) we added in Step 4, Method 1.
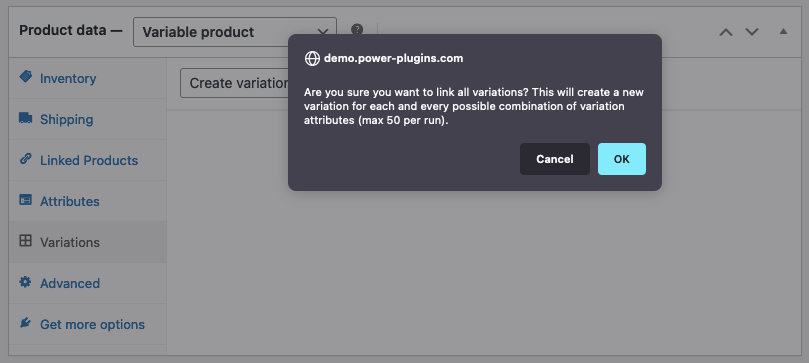
1. Select ‘Create variations from all attributes’.
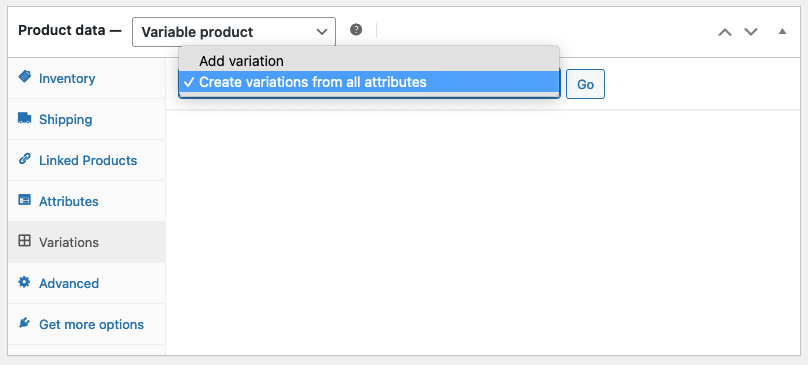
2. Confirm your choice.
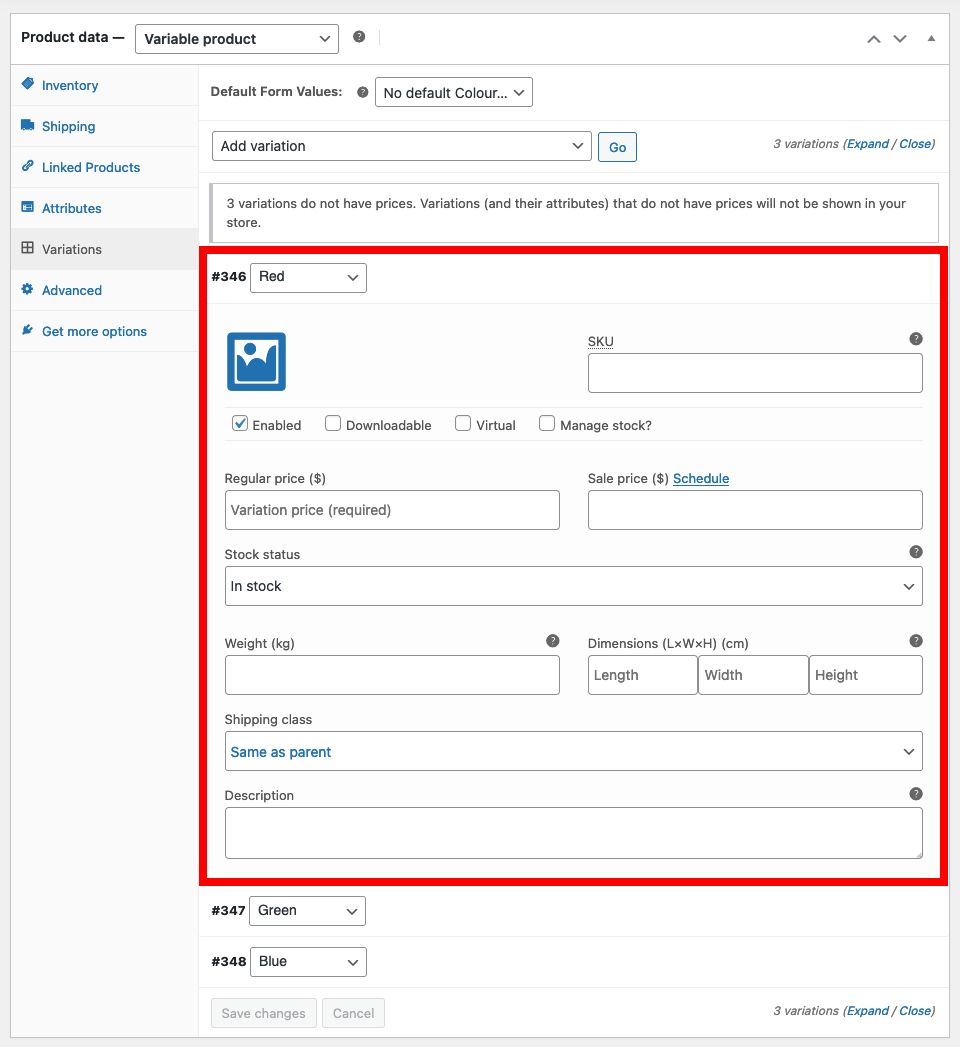
Your variations will now be added and you can begin to add the product data to each.
Make sure you add all of the relevant fields for each variation in here, product variation image, SKU, price, weight, dimensions, etc.
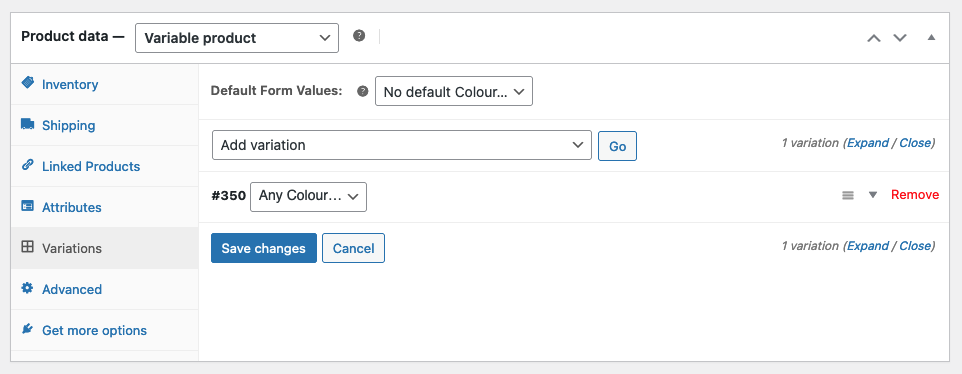
METHOD 2:
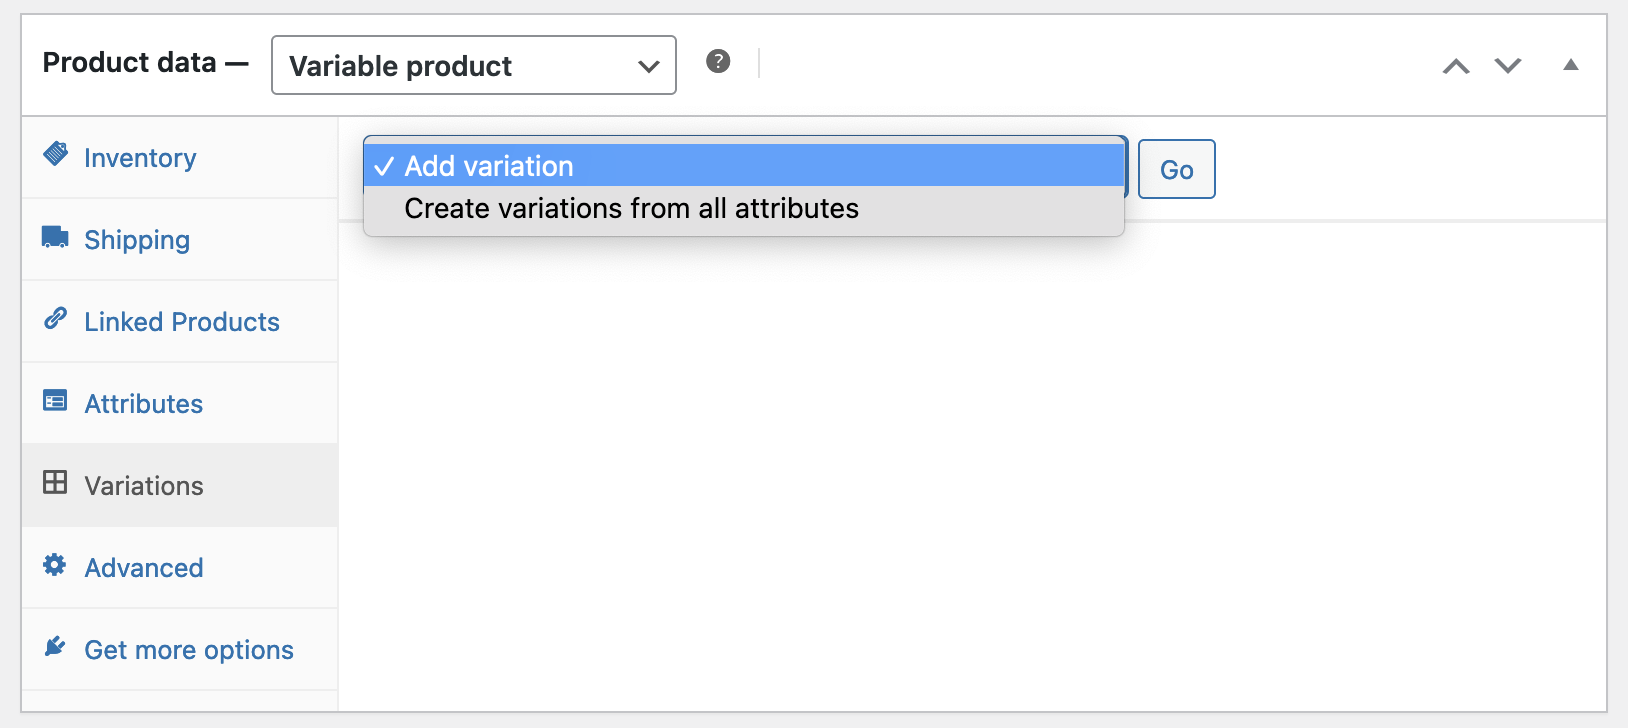
This method allows you to manually add variations of your product.
Simply select ‘Add variation’ from the select menu in the Variations tab, and click ‘Go’.
You can then set up each individual variation, adding all of the relevant fields, such as product variation image, SKU, price, weight, dimensions, etc.
Rinse and repeat the process for the rest of your product variations.
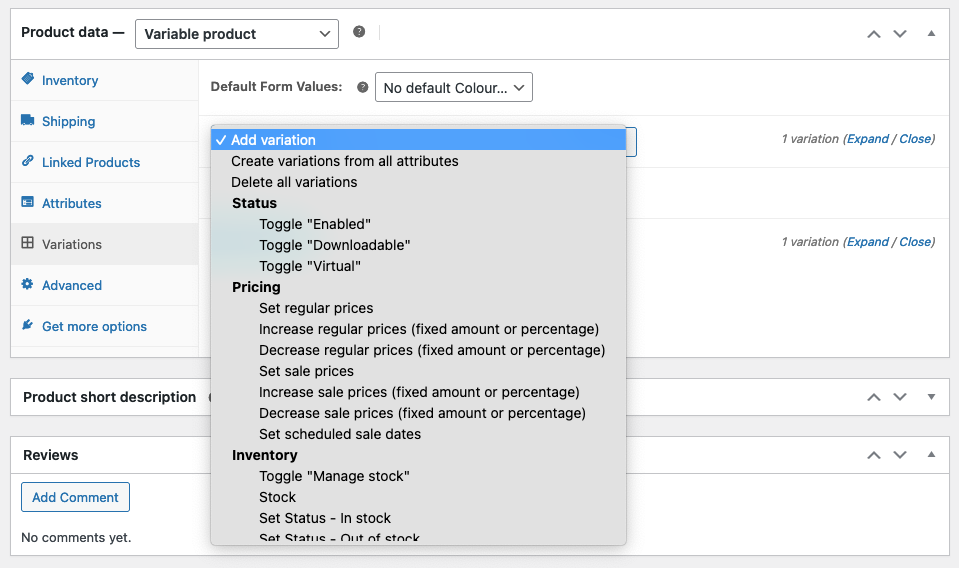
Click on the select menu again also now gives you more options to play with. From here you can bulk edit much of the product data – very useful when dealing with a lot of variations!
Once you have filled out all of the fields necessary, click the Publish button in the top right of your screen to publish your WooCommerce Variable Product.
