Learn how to install XAMPP on Windows 10/11. Configure it to serve as many locally-hosted dev sites as you need.
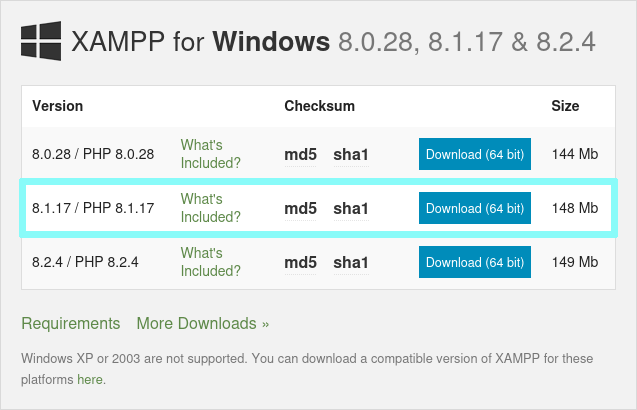
To start things off, download the correct version of XAMPP. If you’re unsure which one to grab, go for “the middle one”. In this case, we’ll download version that contains PHP 8.1.
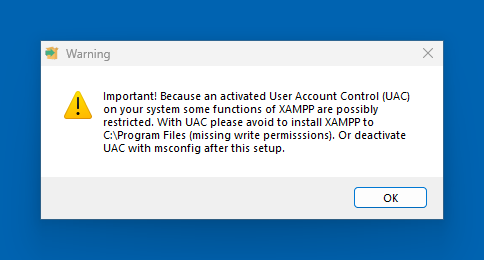
When you start installing on Windows, you’ll probably see a warning about User Access Control. This just means we need to install XAMPP to a location like “C:\xampp\” (instead of the usual “C:\Program Files\”). Just click OK here to acknowledge the message.
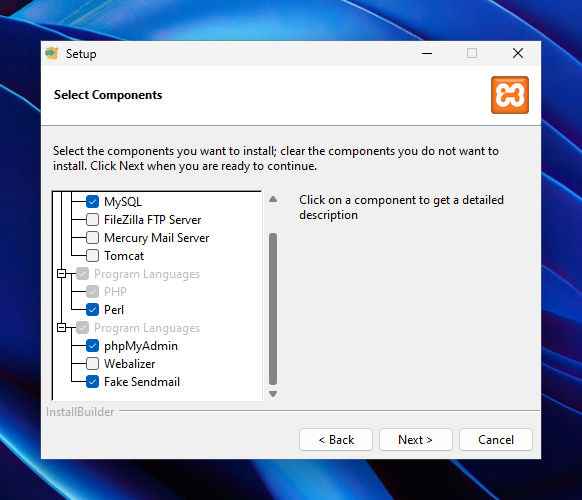
When asked choose which components to install, we can remove the ones we don’t want. In this case, I’ve removed the FTP server, Mail Server, Tomcat and Webalizer. You can install everything if you prefer to do that.
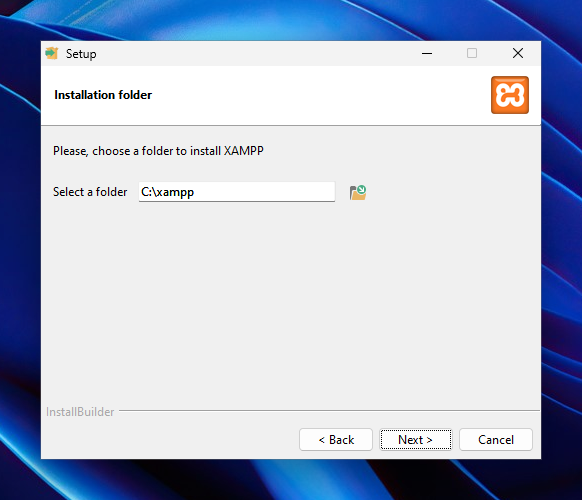
On the next page, choose an installation folder that’s simple like “C:\xampp\”. Then finish the wizard and let the software install itself.
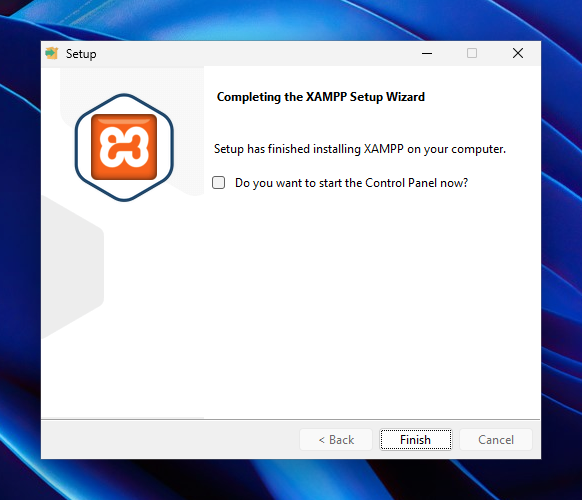
When the wizard has finished installing, it will ask if you want to launch the control panel now – uncheck the box and exit the wizard- we do not want to run it yet.
We need to always run the XAMPP Control Panel as an Administrator, so right-click on the XMAPP icon and go to Properties.
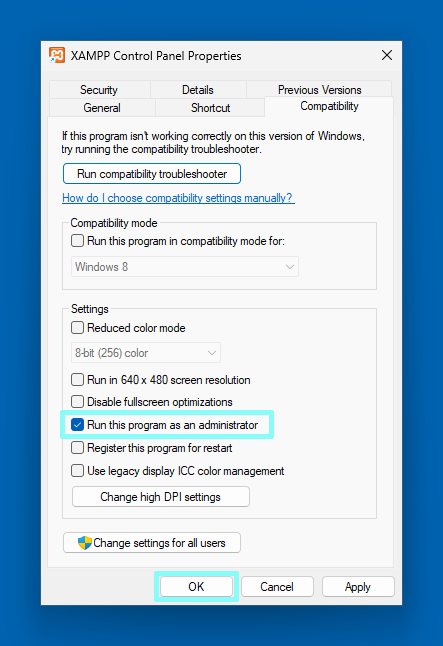
When that’s done, launch XAMPP from its icon and you’ll be prompted to confirm that it’s OK for the app to make changes to your device. That just confirms that the XAMPP Control Panel is running as Administrator 👍
Configure host name lookups
When a computer resolves a host name into an IP address, it first checks a local file called “C:\Windows\System32\Drivers\etc\hosts”. We can add custom lookups in here for our locally hosted dev sites.
Run Notepad as Administrator then go to File Open, navigate to “C:\Windows\System32\Drivers\etc”, change the filter to show “All Files *.*” and open “hosts”.
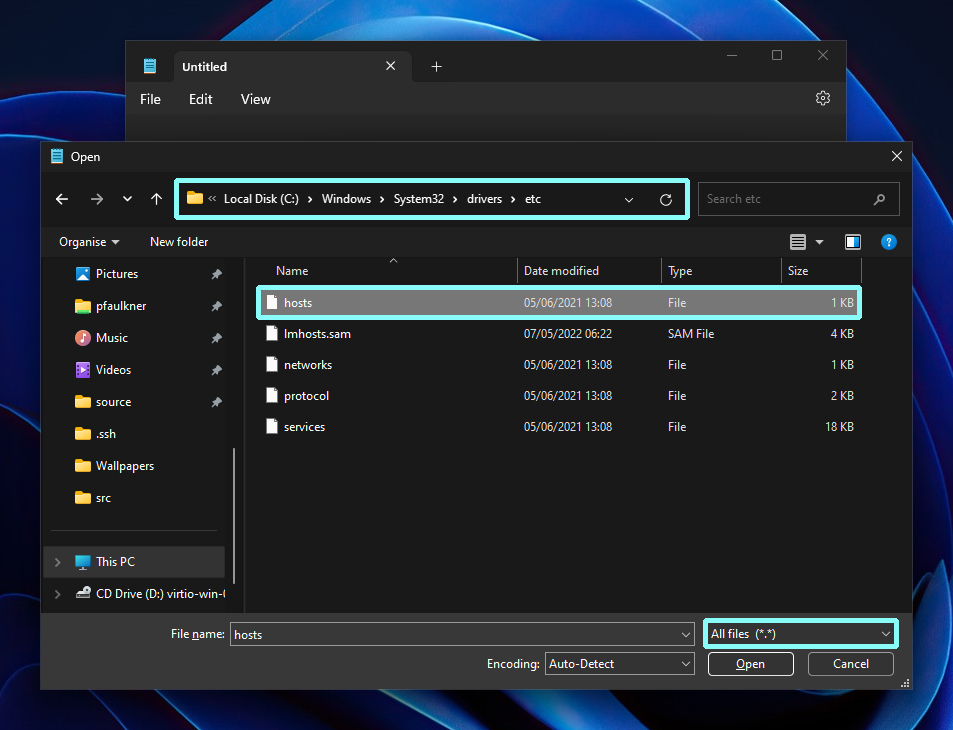
Add the following lines to the end of the file. You can change the host names to suit your projects, and you can add as many as you like:
##
# XAMPP Development Sites
#
127.0.0.1     scratch.localdev
127.0.0.1     my-client.localdev
127.0.0.1     local-shop.localdev
127.0.0.1     another-shop.localdev
Save that, close Notepad, open a terminal (command prompt) and type the following:
REM Check that hostname lookups are working
ping scratch.localdev
You should see a response that confirms a response from “127.0.0.1”, like this:
Pinging scratch.localdev [127.0.0.1] with 32 bytes of data:
Reply from 127.0.0.1: bytes=32 time<1ms TTL=128
Reply from 127.0.0.1: bytes=32 time<1ms TTL=128
Reply from 127.0.0.1: bytes=32 time<1ms TTL=128
Reply from 127.0.0.1: bytes=32 time<1ms TTL=128

Ping statistics for 127.0.0.1:
    Packets: Sent = 4, Received = 4, Lost = 0 (0% loss),
Approximate round trip times in milli-seconds:
    Minimum = 0ms, Maximum = 0ms, Average = 0ms
The first line of the output confirms that “scratch.localdev” has resolved to “127.0.0.1” – great.
Check Apache’s core config
Run Notepad as Administrator, go to File > Open and navigate to “C:\xampp\apache\conf”, set the file filter to “All Files *.*” and open “httpd.conf”. Find the line that starts # Virtual hosts and make sure the following line does NOT start with # (i.e. it’s not commented out). If it does start with #, just remove it and save the file.
# Virtual hosts
Include conf/extra/httpd-vhosts.conf
Create Apache virtual hosts
With Notepad running as Administrator, open “C:\xampp\apache\conf\extra\httpd-vhosts.conf”, delete all the text that’s in there (it’s just comments and examples) then paste the following into it:
##
# XAMPP virtual host definitions
# C:\xampp\apache\conf\extra\httpd-vhosts.conf
#

# All our websites are stored in sub-directories under here.
<Directory "C:/xampp/vhosts">
    AllowOverride All
    Require all granted
</Directory>

##
# Each site needs a ServerName that matches an entry in
# C:\Windows\System32\Drivers\etc\hosts
#
<VirtualHost *:80>
    ServerName scratch.localdev
    DocumentRoot "C:/xampp/vhosts/scratch.localdev/htdocs"
    ErrorLog "C:/xampp/vhosts/scratch.localdev/log/error.log"
    CustomLog "C:/xampp/vhosts/scratch.localdev/log/access.log" common
</VirtualHost>

<VirtualHost *:80>
    ServerName my-client.localdev
    DocumentRoot "C:/xampp/vhosts/my-client.localdev/htdocs"
    ErrorLog "C:/xampp/vhosts/my-client.localdev/log/error.log"
    CustomLog "C:/xampp/vhosts/my-client.localdev/log/access.log" common
</VirtualHost>
Save the file and exit Notepad.
Now we just need to create some folders to hold our websites (files and logs). Create the following folder structure under “C:\xampp\vhosts\”.
- C:\xampp\vhosts\
- scratch.localdev
- htdocs
- log
- my-client.localdev
- htdocs
- log
- scratch.localdev
Make a test HTML file
Create a simple HTML file for each virtual host and save it in its “htdocs” folder. We’ll delete these files later, so they only need to be simple.
<!DOCTYPE html>
<html>
	<head>
		<title>scratch.localdev</title>
	</head>
	<body>
		<h1>scratch.localdev</h1>
	</body>
</html>
Change the title and h1 tags so they contain the virtual host’s name (e.g. “my-client.localdev”).
Start and test Apache
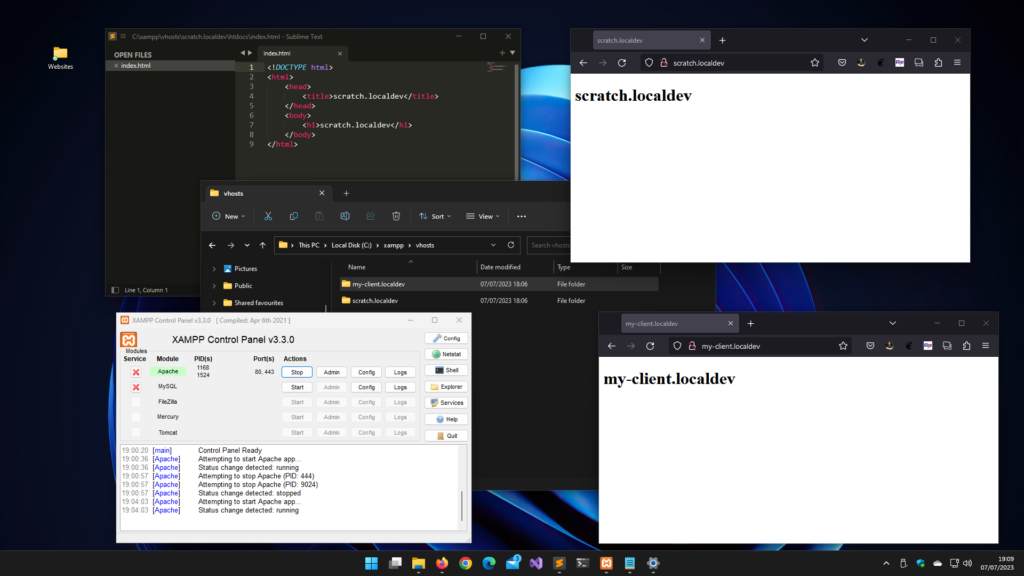
If XAMPP Control Panel isn’t already running, run it now. Click the “Start” button for the Apache service.
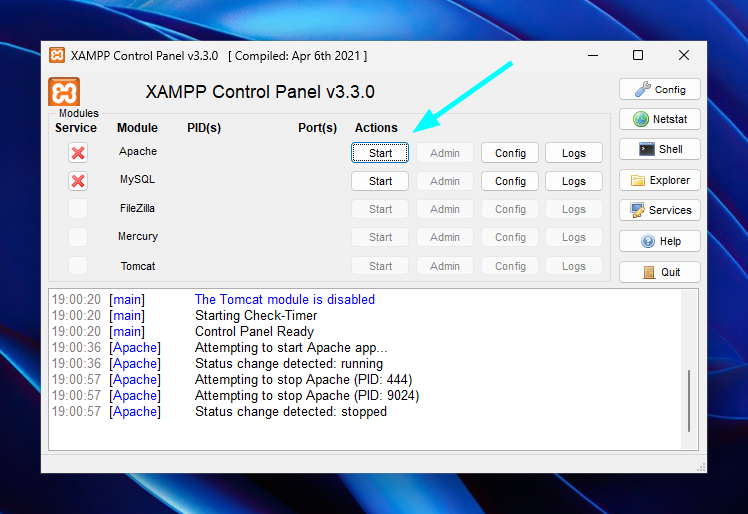
Now you can navigate to http://scratch.localdev/ and http://my-client.localdev/ to verify the two dev sites are working 👍
Testing PHP
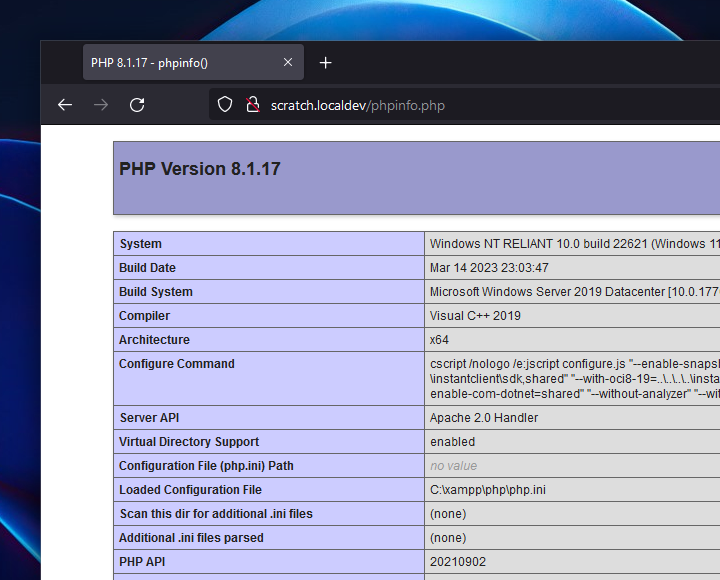
Create a new file in “C:\xampp\vhosts\scratch.localdev\htdocs” called “phpinfo.php” and add the following snippet:
<?php

phpinfo();
…then navigate to http://scratch.localdev/phpinfo.php and confirm you’re seeing the PHP diagnostic info page.
Adding more local dev sites
All you need to is:
- Edit “C:\Windows\System32\Drivers\etc\hosts” and add the new host name
e.g.127.0.0.1 amazing-new-client.localdev - Edit “C:\xampp\apache\conf\extra\httpd-vhosts.conf” and create a new
<VirtualHost *:80>...</VirtualHost>definition, whereServerNamematches the host name you added to your “hosts” file - In “C:\xampp\vhosts\” create a subfolder with the new host name, and put subfolders in there called “htdocs” and “log”
- Put your web content into the new “htdocs” folder
- Restart the Apache service in XAMPP
Apache & PHP running locally on your Windows dev machine, with support for multiple sites 😎 👍


