
Learn how to install XAMPP on a Mac so it can host multiple localhost WordPress sites simultaneously.
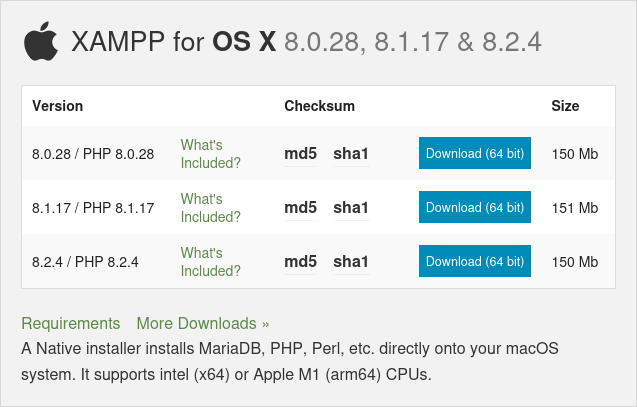
The first thing to do is download the correct version of XAMPP. If you’re not sure which version to download, get “the middle one”. So if PHP 8.0, PHP 8.1 and PHP 8.2 are the options, download the version that includes PHP 8.1.
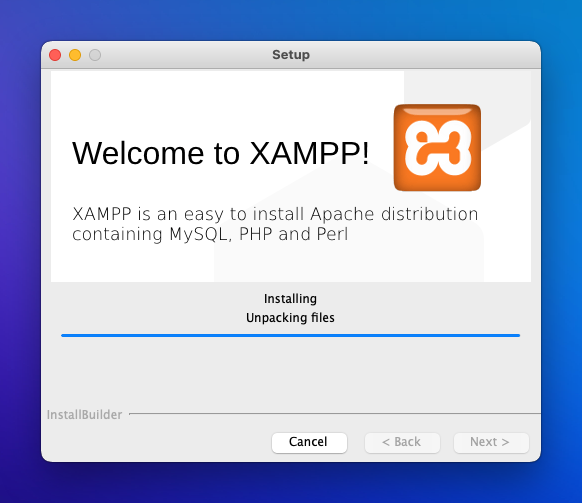
The installer for Mac doesn’t have many options, so just accept the defaults and run through to the end of the wizard.
Windows or Ubuntu?


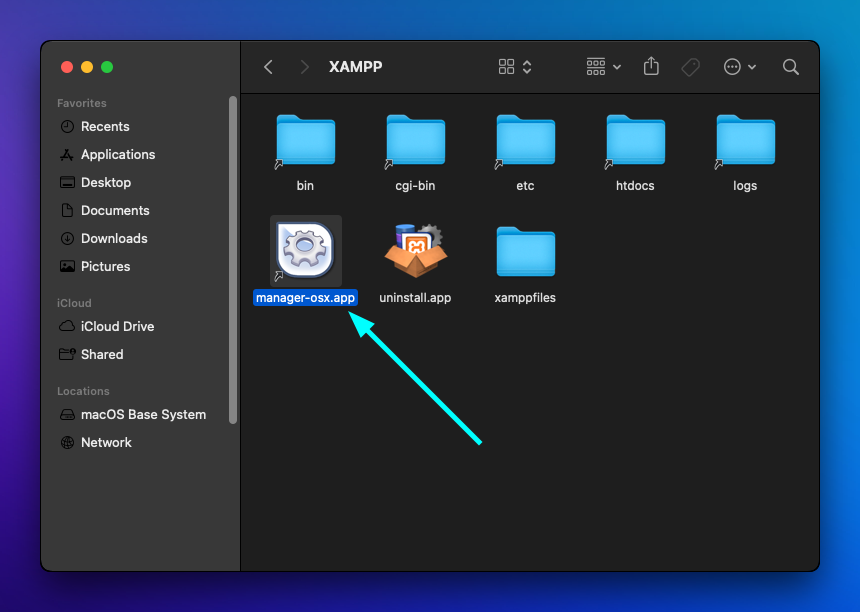
After it’s finished, you can launch the XAMPP Control Panel by going to Applications > XAMPP and running “manager-osx.app”.
Configure host name lookups
Whenever your computer tries to convert a host name into an IP address, it checks a local file called “/etc/hosts” before it checks DNS. So we can add custom host name lookups in this local file and call the anything we want.
Open a terminal window and type the following to edit your system’s “/etc/hosts” using nano (as administrator):
# Edit the local hostname lookup file: /etc/hosts
sudo nano /etc/hosts
…then add the following lines to the end of the file to define some custom host-name lookups. These names are just examples – you can give them any names you want.
##
# XAMPP Development Sites
#
127.0.0.1    scratch.localdev
127.0.0.1    my-client.localdev
127.0.0.1    local-shop.localdev
127.0.0.1    another-shop.localdev
Press CtrlO to save the changes.
Press CtrlX to exit nano and return to the command-line shell.

Test these have worked by pinging one of the host names from the terminal, like this:
# Ping one of our custom host names
ping scratch.localdev
You should see responses from “127.0.0.1” (localhost), like this:
64 bytes from localhost (127.0.0.1): icmp_seq=7 ttl=64 time=0.043 ms
64 bytes from localhost (127.0.0.1): icmp_seq=7 ttl=64 time=0.043 ms
64 bytes from localhost (127.0.0.1): icmp_seq=7 ttl=64 time=0.043 ms
Press CtrlC to stop the ping command.
Check/Adjust Apache’s core config
We need to check, and maybe adjust, Apache’s core configuration file to make sure the vhosts (Virtual Hosts) sub-configuration is enabled.
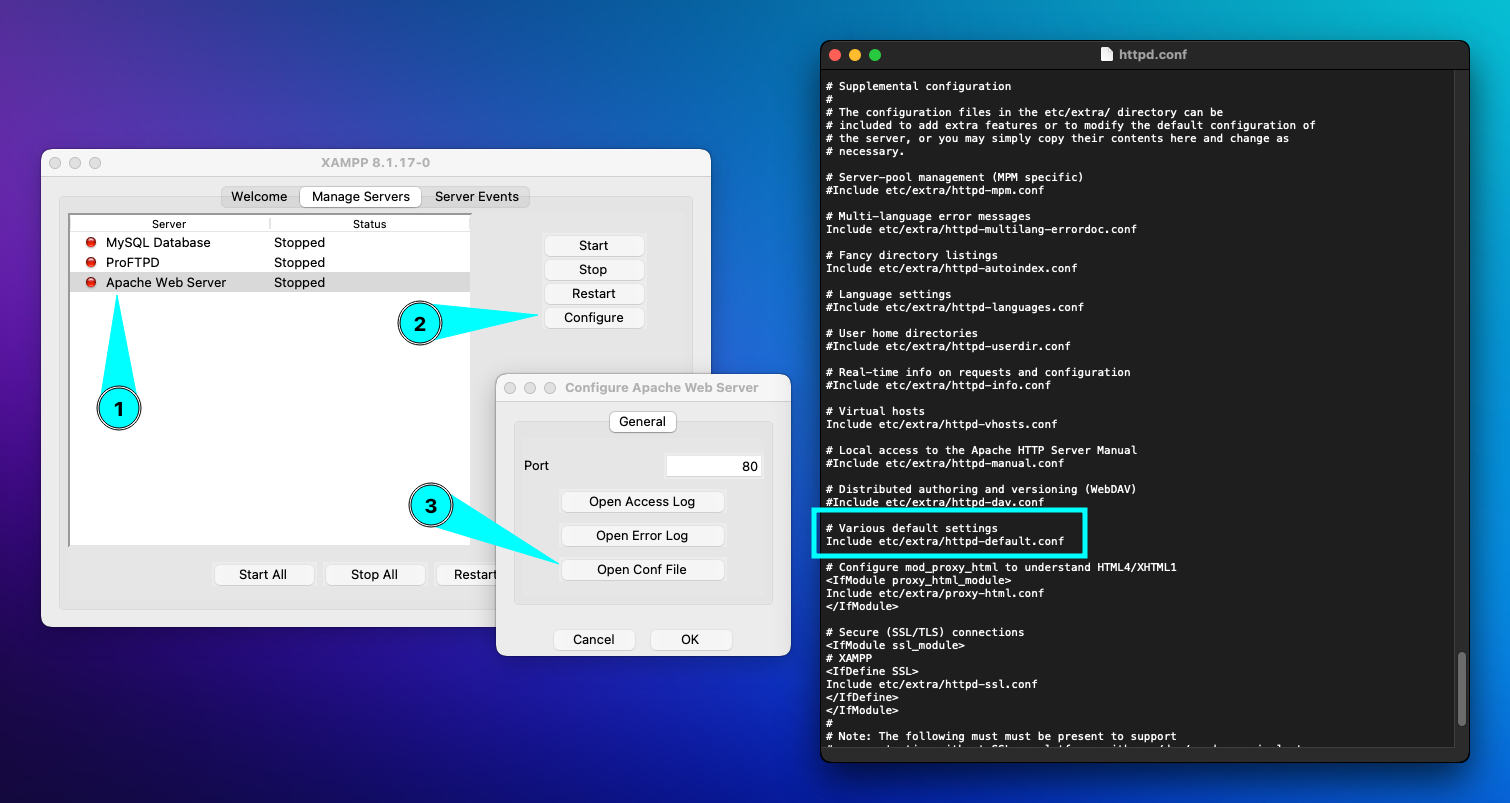
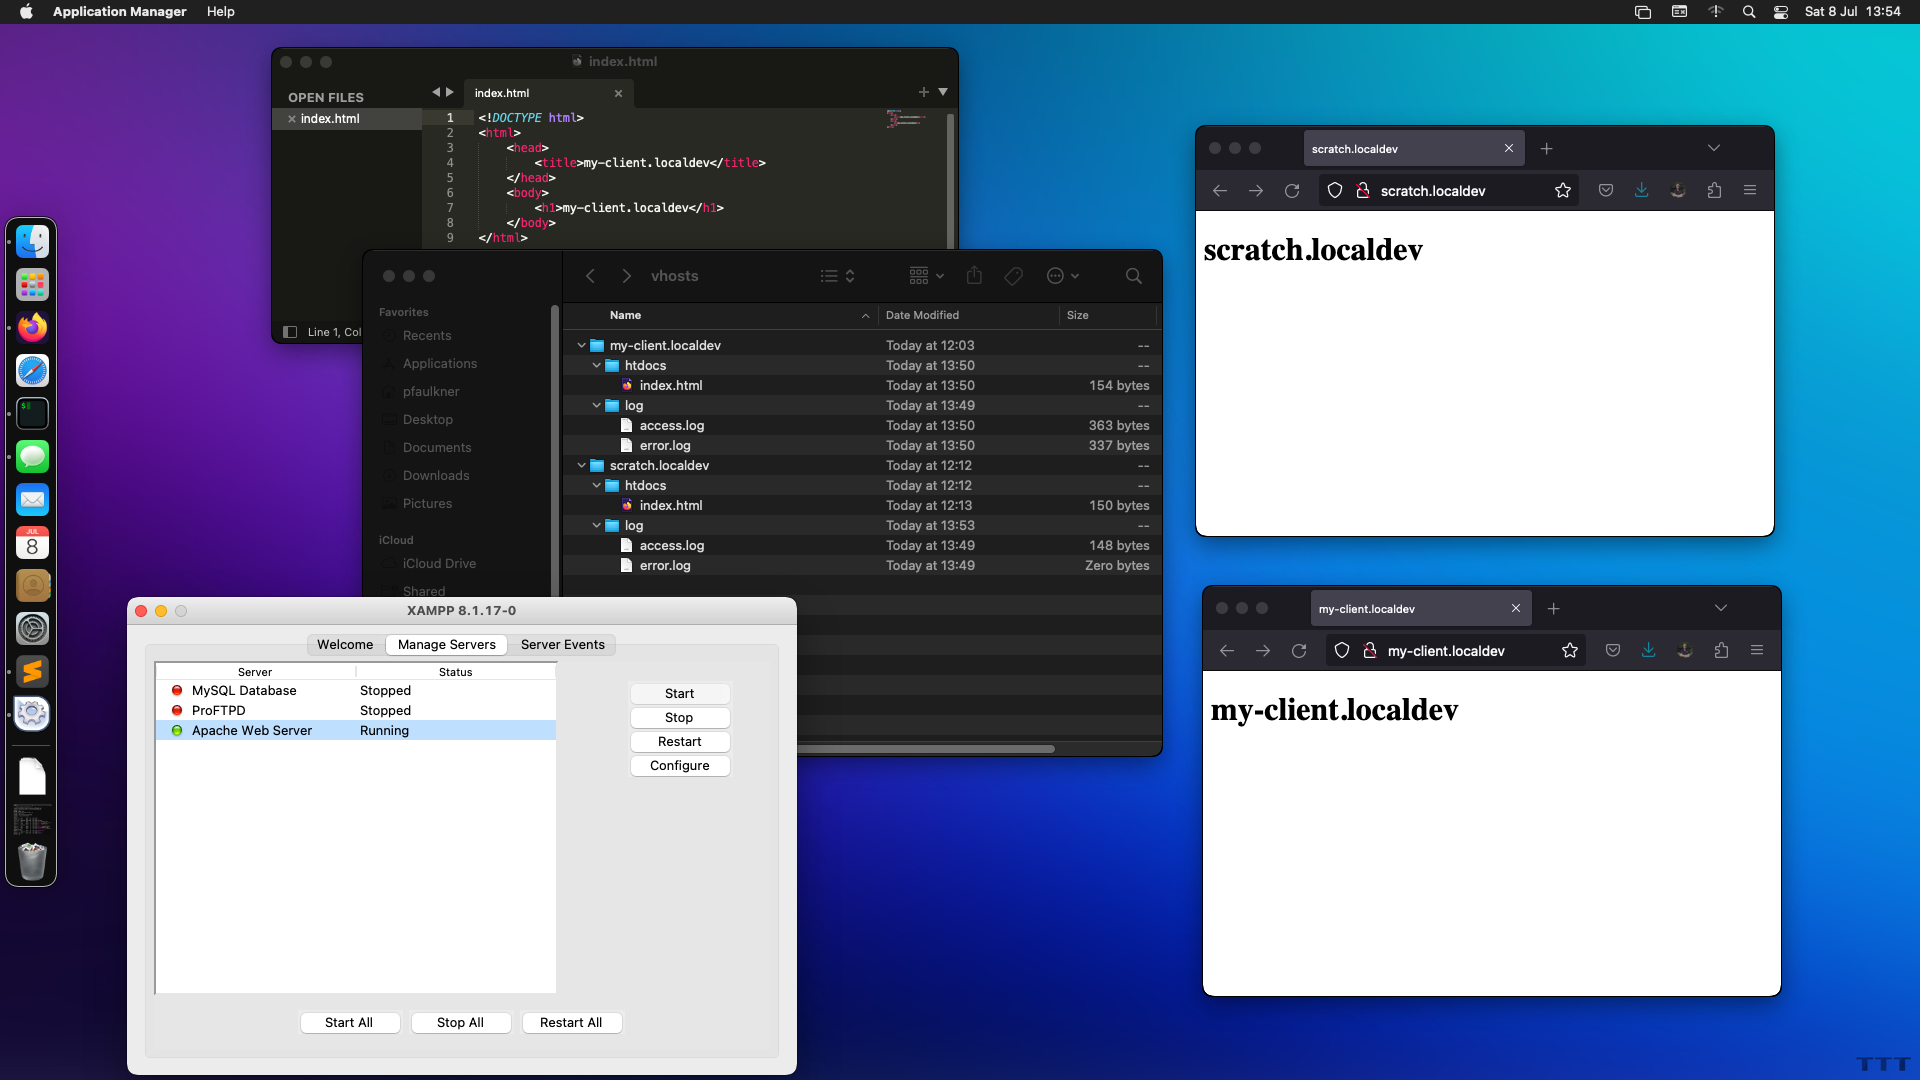
If the XAMPP Control Panel isn’t already running, start it now. Select the “Apache Web Server”, click “Configure”, open the “Conf” file and find the line, # Virtual Hosts. The line that comes after it should read Include etc/extra/httpd-vhosts.conf. If that line is commented-out (i.e. if it starts with #), remove the # and save the file. Exit Text Editor.
In Finder, navigate to Applications > XAMPP > etc > extra and open “httpd-vhosts.conf” in Text Editor. This is where we tell Apache about our individual virtual hosts. Delete all the text in the file (it’s just comments and examples), replace it with the following, save the changes then exit Text Editor.
##
# XAMPP virtual host definitions
# /Applications/XAMPP/etc/extra/httpd-vhosts.conf
#

# All our websites are stored in sub-directories under here.
<Directory "/Applications/XAMPP/vhosts">
    AllowOverride All
    Require all granted
</Directory>

##
# Each site needs a ServerName that matches an entry in /etc/hosts
#
<VirtualHost *:80>
    ServerName scratch.localdev
    DocumentRoot "/Applications/XAMPP/vhosts/scratch.localdev/htdocs"
    ErrorLog "/Applications/XAMPP/vhosts/scratch.localdev/log/error.log"
    CustomLog "/Applications/XAMPP/vhosts/scratch.localdev/log/access.log" common
</VirtualHost>

<VirtualHost *:80>
    ServerName my-client.localdev
    DocumentRoot "/Applications/XAMPP/vhosts/my-client.localdev/htdocs"
    ErrorLog "/Applications/XAMPP/vhosts/my-client.localdev/log/error.log"
    CustomLog "/Applications/XAMPP/vhosts/my-client.localdev/log/access.log" common
</VirtualHost>
We’ve set up two virtual hosts in here, “scratch.localdev” and “my-client.localdev”. Each ServerName entry needs to match a host name from “/etc/hosts”, then we just specify the paths for the PHP/HTML files (DocumentRoot), and the two log files.
Now we just need to create the folders for the virtual hosts.
Go back to the terminal window and enter the following:
# Create a vhosts folder and move it into /Applications/XAMPP/
mkdir ~/vhosts
mv ~/vhosts /Applications/XAMPP/
ln -s /Applications/XAMPP/vhosts/ ~/Websites
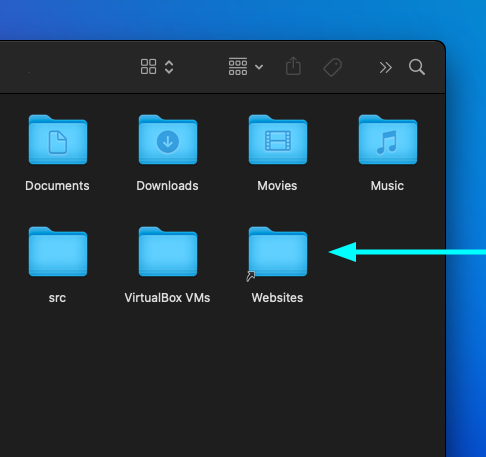
Open Finder and navigate to your home folder and you’ll see a new linked-folder (symlink) called “Websites”. Go into this folder and create a new folder for each host that you added to “/etc/hosts”. In each of these host folders create two sub-folders, called “htdocs” and “log”.
You should end up with a structure like this:
- /Users/paul/Websites (link: “/Applications/XAMPP/vhosts/”)
- scratch.localdev
- htdocs
- log
- my-client.localdev
- htdocs
- log
- scratch.localdev
Create a test HTML file
Next up, create HTML files in the “htdocs” folders. We’ll delete these later so they only need to be simple:
<!DOCTYPE html>
<html>
	<head>
		<title>scratch.localdev</title>
	</head>
	<body>
		<h1>scratch.localdev</h1>
	</body>
</html>
Change title and h1 so they show the name of the containing folder (e.g. “my-client.localdev”).
Enable and test
If the XAMPP Control Panel isn’t already running, launch it now. Then go to “Manage Servers” and start the Apache Web Server.
Now you can point your browser to http://scratch.localdev/ and http://my-client.localdev/ – you’ve got two local dev sites up-and-running 👍
Testing PHP
Create a file in “/Applications/XAMPP/vhosts/scratch.localdev/htdocs” called “info.php“, paste the following couple of lines and save it.
<?php

phpinfo();
…then navigate to http://scratch.localdev/info.php. If you get the PHP info page, everything is working.

Adding more local dev sites
Adding more sites:
- Edit (sudo) “/etc/hosts” and the new host name (e.g. “127.0.0.1 amazing-new-client.localdev”).
- Edit “/Applications/XAMPP/etc/extra/httpd-vhosts.conf” and create a new
<VirtualHost *:80>...</VirtualHost>snippet, and make sureServerNamematches your new host name. UpdateDocumentRoot,ErrorLogandCustomLogtoo. - In “/Applications/XAMPP/vhosts” (linked to by “Websites” in your home folder), create a subfolder with the new host name, and put two subfolders in there, called “htdocs” and “log”
- Put your web content into the new “htdocs” folder
- Use the XAMPP Control Panel to restart the Apache service
That’s it – multiple locally hosted dev sites 😎 👍
